Hello beautiful ladies! We’re here with super stunning DIY jewelry holder ideas for you. Are you excited? We know how hassle it can be to pick out your favorite jewelry pieces to match your outfits perfectly. Especially when you’re in a hurry, right? Worry not! These super doable DIY jewelry holder ideas are here for the rescue. If tangled necklaces are your biggest pet peeve, you are in the right place! Our awesome yet creative DIY jewelry organizers will take all your worries away. These DIY jewelry organizer ideas are easy to follow and will save you lots of time when you’re running late.
Keep your jewelry safe and organized with these easy-to-make diy jewelry holder ideas. From DIY necklace organizers to hanging jewelry displays, here are 25 unique ways to keep your favorite pieces of jewelry at the ready. Pick one that suits your needs and start organizing!
From cheap cardboard jewelry organizer to a homemade hanging jewelry holder and a marbled DIY jewelry box to a DIY jewelry display organizer. You’ll find 25 different DIY jewelry holder ideas that will transform your life! Moreover, all these ideas are crazily versatile and the perfect way to revamp the look of your room.
Not only will you be able to showcase your favorite jewelry pieces in style but also add a chic look to the place. Say goodbye to a chaotic jewelry drawer and make a closet separately for your jewelry instead! Isn’t that just superb? So, what are you waiting for? Let’s start already!
1. DIY Large Jewelry Organizer
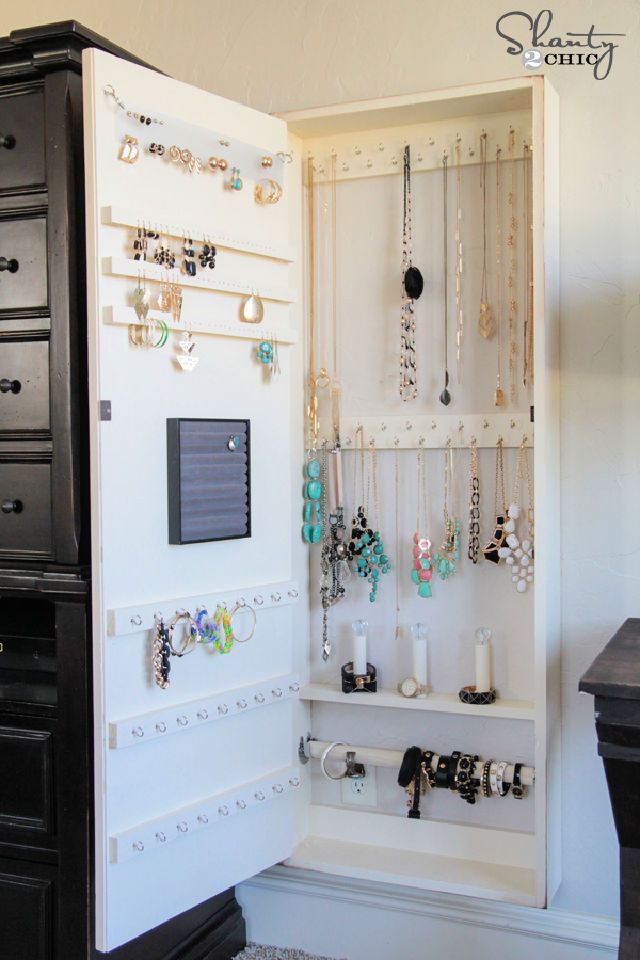
Do you want to display your jewelry collection in a versatile and fascinating way? If yes, nothing would be a better option than having an organizer. Ideally, you can make this displayer yourself instead of getting it from a store. Even if you are a beginner crafter, you can still work on this idea by following the step-by-step instructions and guidelines. The things you will need to make this organizer include white wood boards, power drill, hardwood plywood piece, woodcut strips, wooden dowel, rod hangers, a ring tray and a Kreg jig. shanty 2 chic
2. Unique DIY Jewelry Holder
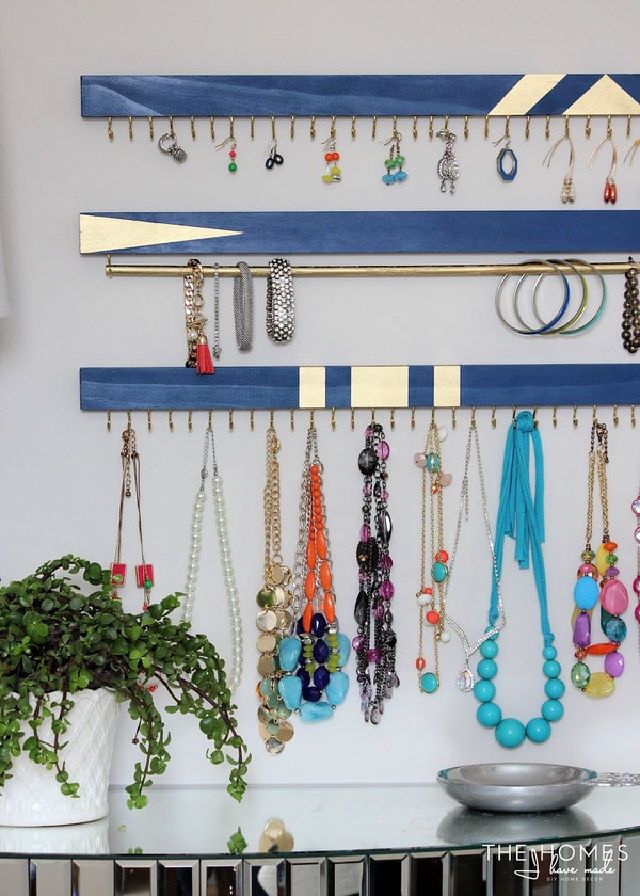
Display your jewelry items fascinatingly and creatively with this jewelry organizer. You can follow the step-by-step instructions and guidelines even if you are not a crafter to make this displayer. Indeed, it would be the best consideration to showcase all the fancy and handmade jewelry items. If you also want to make it, you will need a woodcut of your choice, cup hooks, wooden dowel, wood stain, ruler, pencil, black sharpie, drill bit, command hooks, hanging hardware of your choice and a sanding block. You can modify the size of the dowel and woodcuts according to your space needs and specifications. thehomesihave
3. Jewelry Organizer DIY Dollar Store Hack
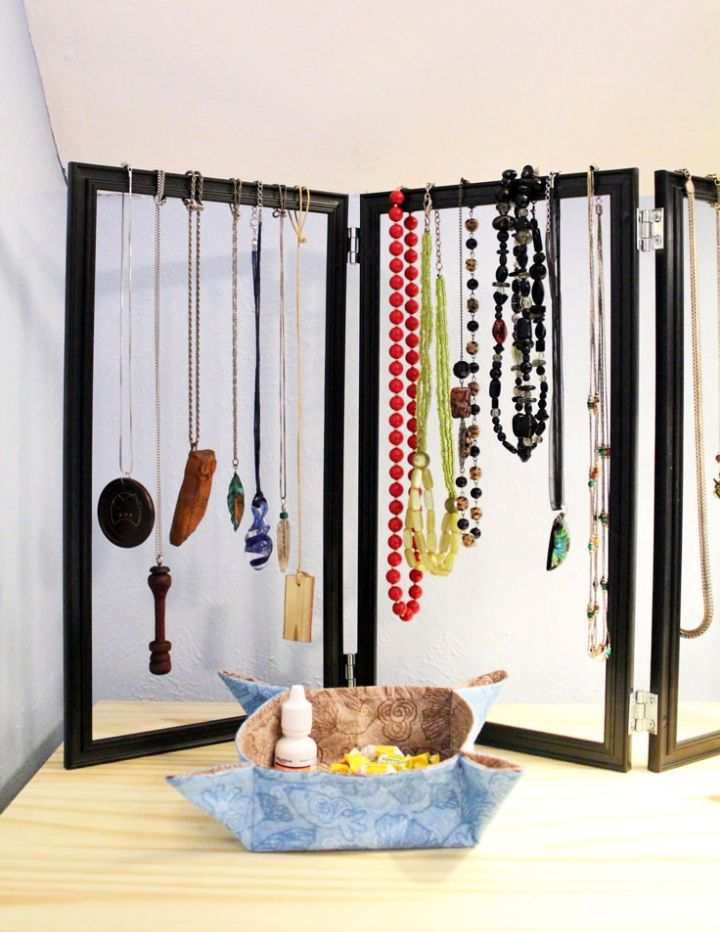
No doubt, we all love the dollar store hacks and products because of their affordability. If you are looking for a modern and inexpensive way to organize your jewelry items, consider adding this dollar store hack organizer to your dresser. Not only can you organize the jewelry, but you can also choose this craft to showcase your ornaments effortlessly and in a versatile way. The needed supplies to make this organizer are picture frames, hinges with screws, flat-nose pliers, screwdriver, tape measure, pencil and a black sharpie marker. You can also recycle an old picture frame to make this organizer. kenarry
4. Cheap Cardboard Jewelry Organizer
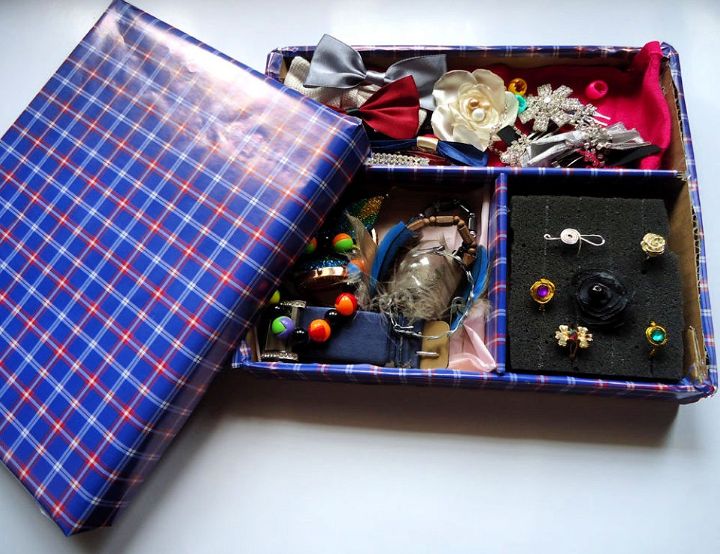
Do you want to keep your jewelry items clutter-free and well-organized in the most affordable way? If yes, nothing would be a better option than choosing this cheap cardboard jewelry organizer. Excitingly! You can make it yourself by following the Instructable guidelines and instructions. Watch the tutorial for further assistance if you are a beginner crafter. You will need to complete this craft, including cardboard, a hot glue gun, sharp blade, scissors, marker and wrapping paper or fabric of your choice. You can also use the template to draw the lines on the cardboard. instructables
5. Homemade Hanging Jewelry Holder
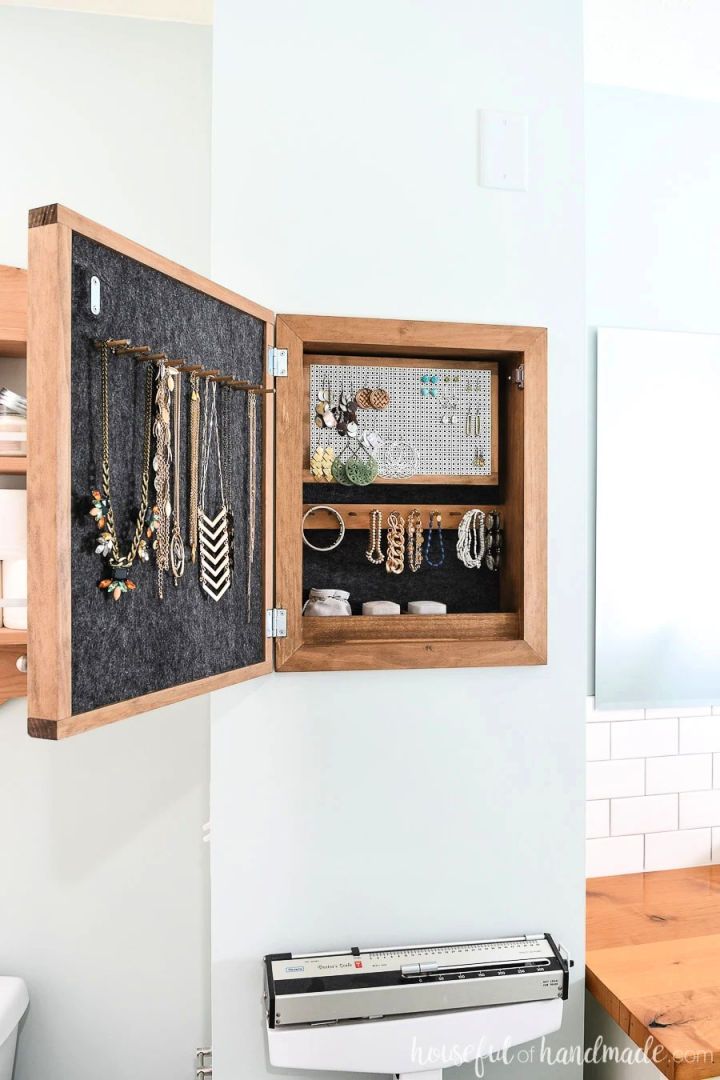
If you are thinking about buying a jewelry organizer from a store, it will surely cost you more than your budget. Have you ever thought about making an organizer yourself? If not, you can surely go for one after this DIY. This plan includes the instructions and guidelines for beginners to make a mesmerizing jewelry organizer. For this project, the needed supplies and materials are pegboard, woodcut according to your choice, nails, a nail gun, wooden dowel, hanging rods, drill bit, Kreg jig, screwdriver, ruler, tape measure and a pencil. housefulofhand
6. Industrial Wall Jewelry Organizer
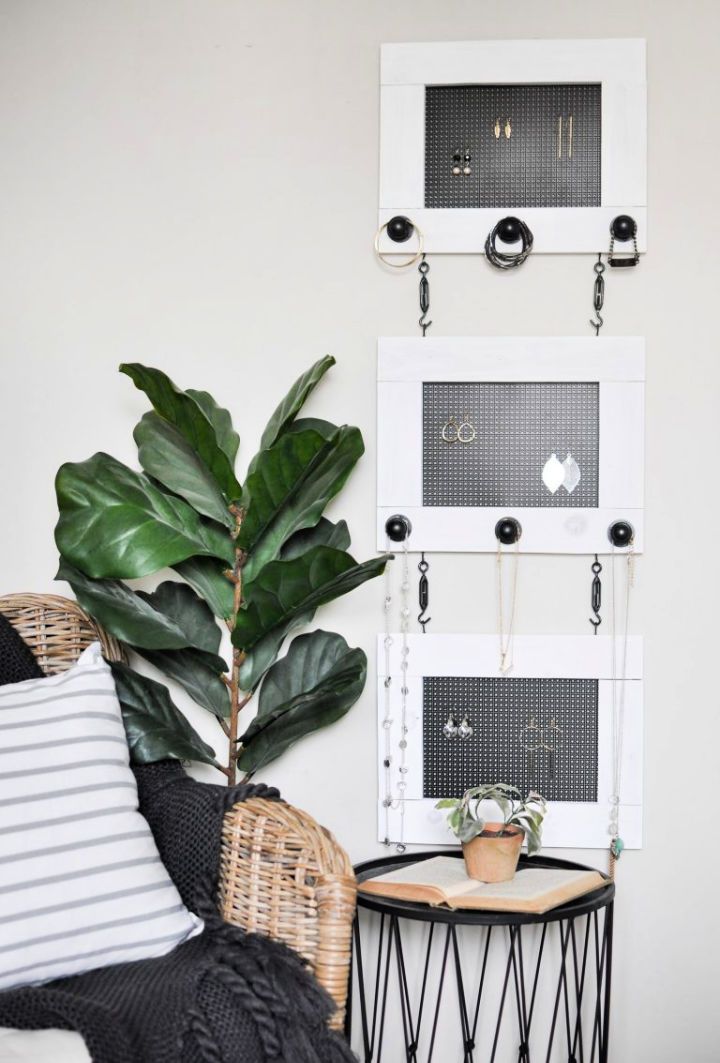
Do you love to work on industrial projects and crafts to improve your skills? If yes, you will surely have some industrial leftovers in your collection. A free weekend is a right time to use that scrap to make a versatile jewelry organizer. You can follow these DIY guidelines and steps to get your hand on the same organizer. The basic needed supplies for this project are industrial knobs, a woodcut of your choice, corner braces, Folk-art white milk paint, paintbrush, aluminum sheet and turnbuckles. cherishedbliss
7. DIY Marbled Jewelry Box
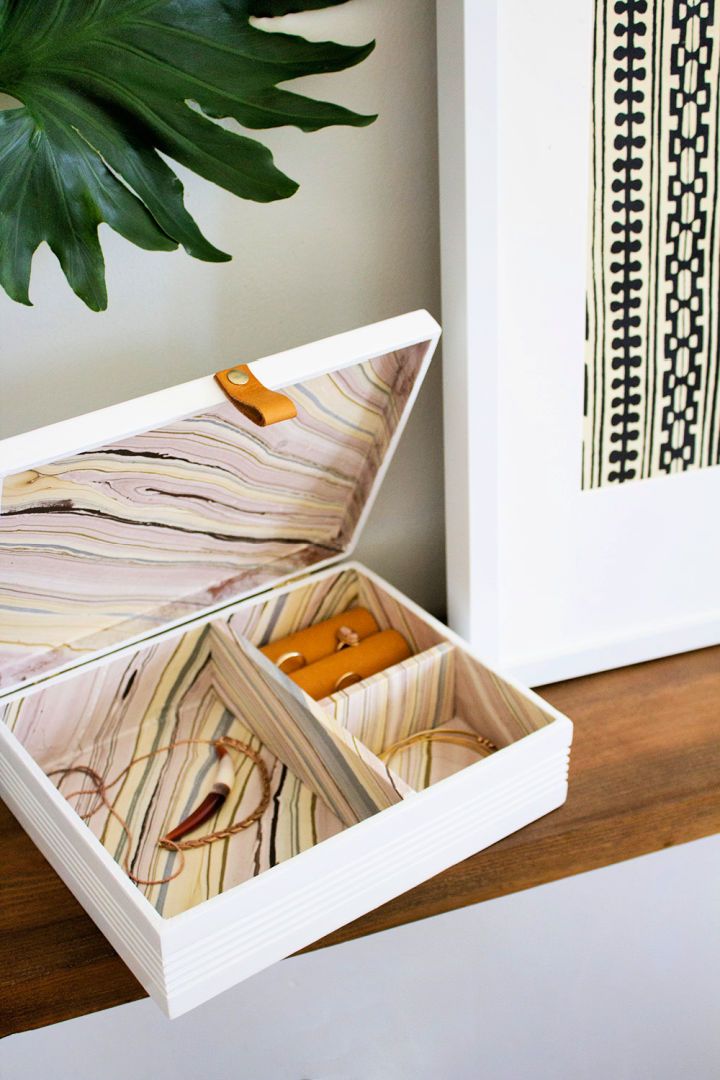
If you are a cigar lover, you will surely have empty cigar boxes in your collection. What’s about using a versatile cigar box to make an affordable jewelry box? Of course, why not! If you are a beginner crafter, you can get the guidelines and instructions from this DIY idea. The best part is that you can place this customized box wherever you want according to your spacing needs and requirements. However, it would be great to place it on your dressing table. To make this organizer, you will need a recycled cigar box, wood putty, sandpaper, paintbrushes, foam cylinders, a hot glue gun, a piece of leather, ruler, mod podge, X-Acto knife, marbled paper, craft wood and brass thumbtacks. annabode
8. Simple DIY Necklace Holder
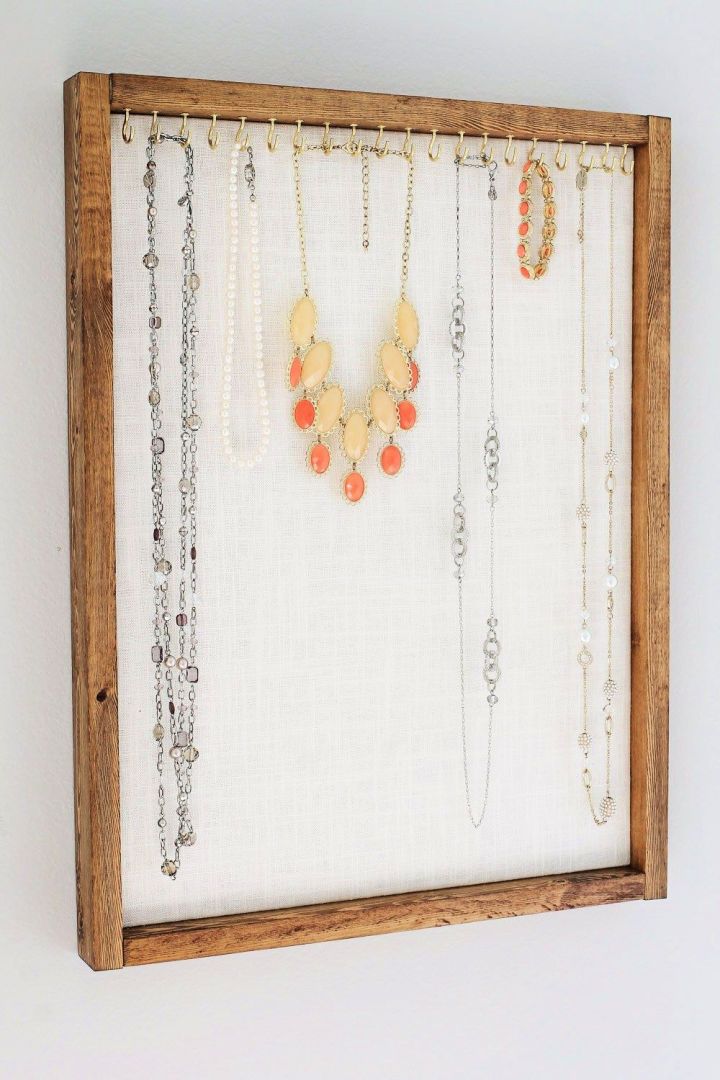
Are you looking for a classy and inexpensive option to hang your necklaces at the same place? If yes, nothing would be a better option than considering this simplest necklace organizer. You can make this organizer yourself by following the step-by-step instructions and guidelines. Indeed, it would be the best project to consider in the summer holidays. The best part is that you can use recycled supplies instead of investing in the new supplies. The basic things you will need to complete this craft include thick plywood panels, brad nails, cup hooks, the fabric of your choice, staples, drill, miter saw, circular saw and a brad nailer. angelamariemade
9. How To Make Wooden Jewelry Holder
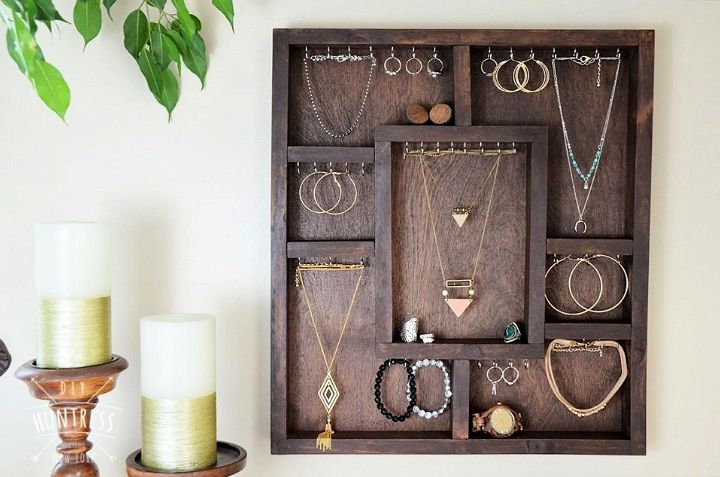
Learn how to make a wooden jewelry organizer yourself by following the DIY instructions and guidelines. It would be the best project to consider if you are a beginner crafter. You can place this organizer inside your dresser and wardrobe according to your spacing needs and requirements. The things you will need to work on this project include woodcut, sheet plywood, wood glue, wood stain, small cup hooks, miter saw, table saw, drill bits, sander, tape measure, pencil and a nail gun. diyhuntress
10. Drawer Ring Earring Organizer
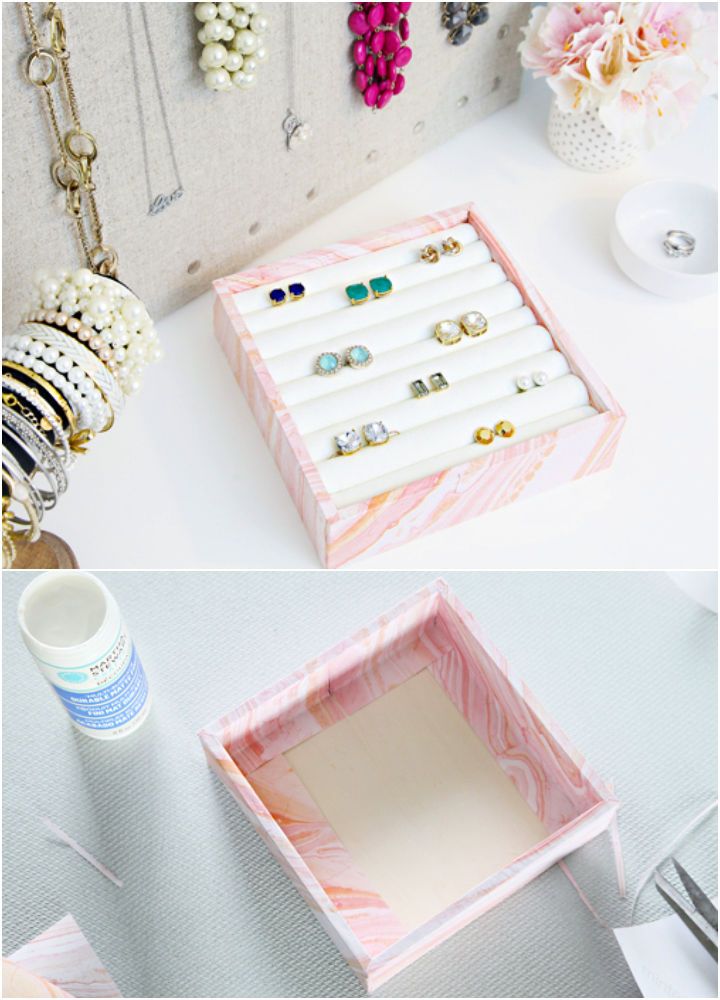
Organize or place your ring’s collection simultaneously with this adorable ring organizer. If you are thinking about buying it from a store, this organizer will surely cost you more than your budget. But you can make it yourself efficiently and affordably with the help of recycled materials. If you want to make this organizer, you will need an unfinished wooden box, dowels, felt, gift wrap, a hot glue gun and fabric of your choice. You can increase or decrease the number of organizing trays according to your needs or collection. iheartorganizing
11. DIY Jewelry Display Organizer
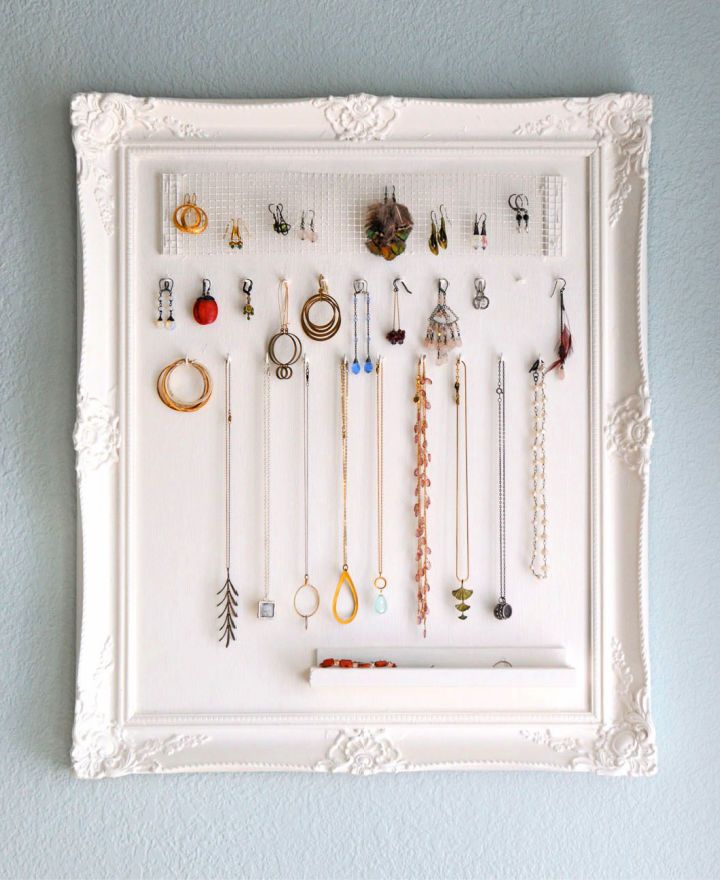
Reuse an old picture frame to make a vintage-style jewelry organizer yourself. Ideally, you don’t need to do anything from scratch to get your hand on this organizer. You can make it effortlessly and efficiently by following the instructions. The basic needed supplies to complete this project are a thick plywood board, wooden dowels, small cup hooks, drill bits, nail gun, nails, the wood stain of your choice, sanding block, metal mesh, white paint, paintbrush, tape measure and a pencil. Indeed, it would be the best and most convenient way to display your jewelry items. monaluna
12. Free Jewelry Rack Plan
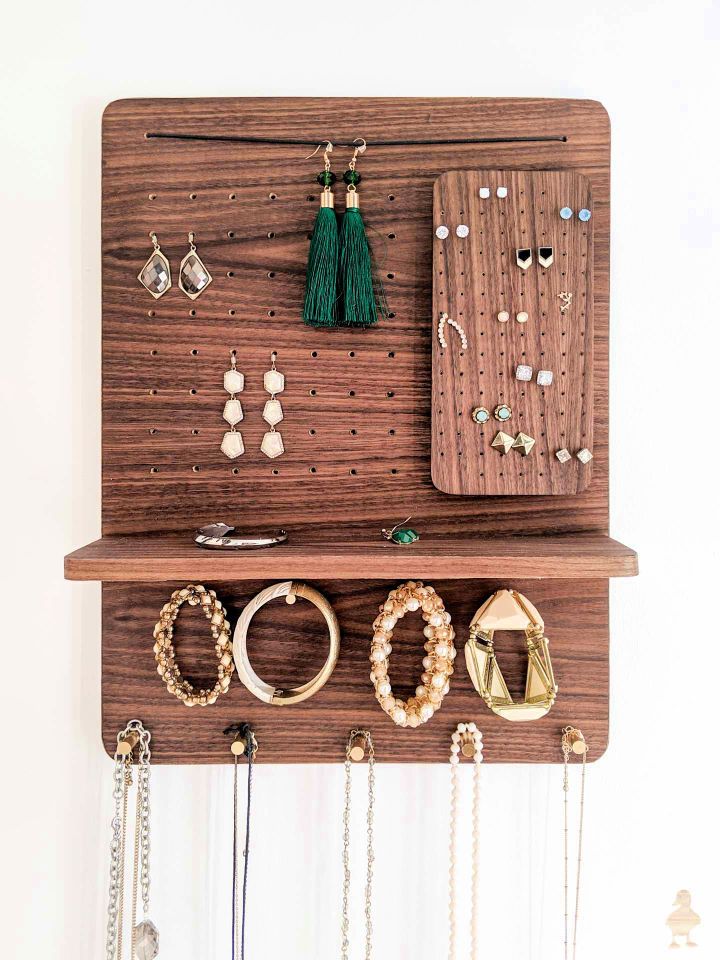
Do you want to organize your jewelry in a good and versatile manner? If yes, you can make a jewelry rack yourself with a free plan instead of getting it from a store. You can use this rack to display all the items, including earrings, necklaces, and rings. The needed or used materials to make this organizer are walnut plywood sheet, scrap wood, assorted brass rods, super glue, pencil, double-sided tape, sandpaper, monkey hooks, black stretch cord, mini magnets and mint tint. You can also get the details from provided image files. uglyduckling
13. Mirrored Gold Hexagon Tray
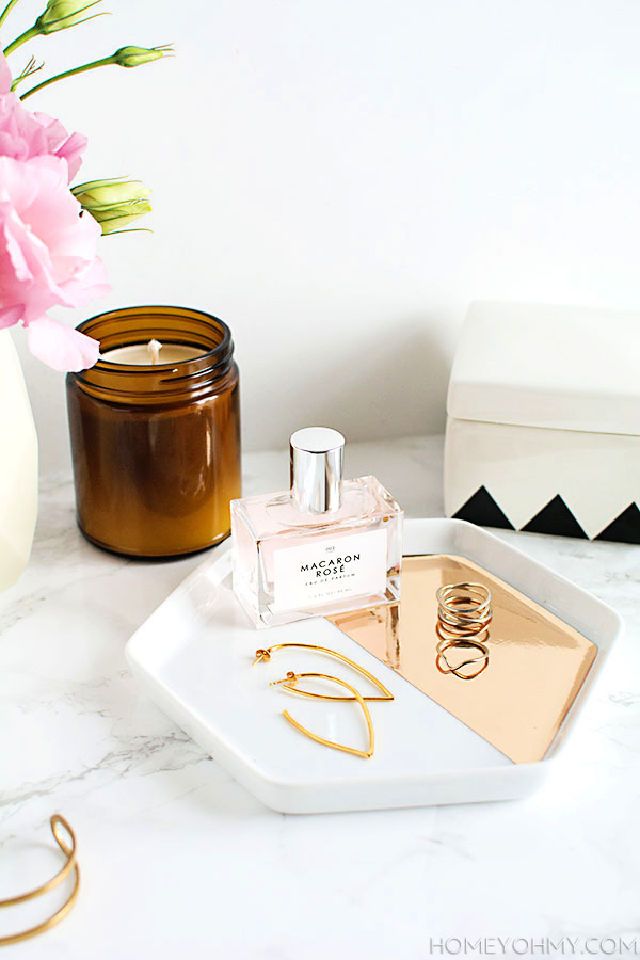
If you are looking for a pretty and elegant jewelry organizer to place on your dresser, nothing would be a better option than considering this mirrored gold hexagon tray. No doubt, this tray will cost you more than your budget if you buy it from a store. That’s why it is a good option to make it yourself with this DIY idea. You can also make the sections in this tray to separate the different jewelry items. To make this tray, you will need a simple ceramic hexagon tray, a piece of gold sheet, a hot glue gun, a mirror, an X-Acto knife, white paint and metallic gold paint spray. homeyohmy
14. Make Any Box Into A Jewelry Box
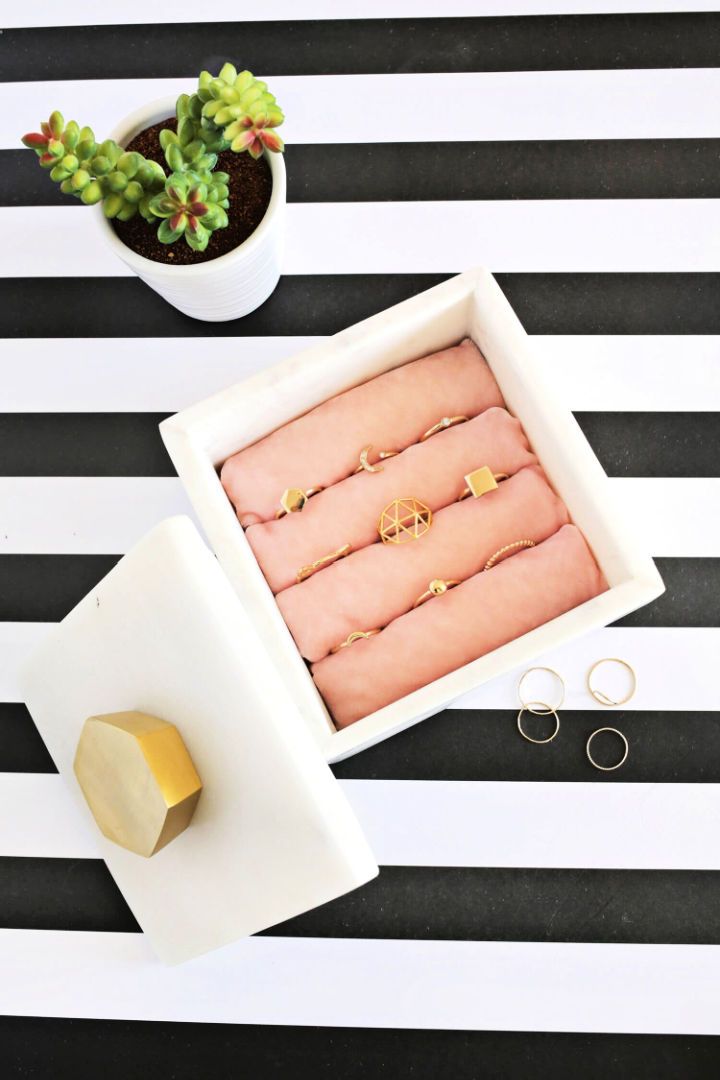
Recycle the empty cardboard boxes from your collection to make a versatile and long-lasting jewelry organizer. If you don’t know how to transform a simple box into an organizer, you can get the complete guidelines and instructions from this DIY. In this way, you don’t need to create the jewelry mess on your dresser by keeping all the pieces mess-free and well-organized in the organizer. The things you will need to get your hand on this craft include a decorative box with a lid, the fabric of your choice, straight pins, a hot glue gun, cotton batting, fabric scissors, a cutting mat and a rotary cutter. abeautifulmess
15. Wall Mounted Jewellery Storage
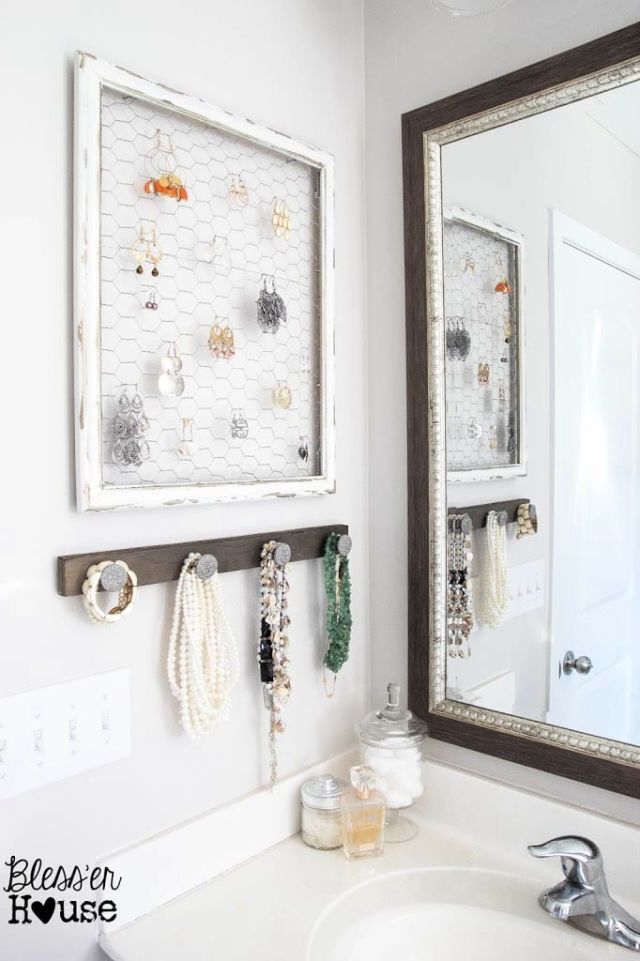
Display your jewelry items on a versatile organizer instead of closing them in the boxes. Yes! With this DIY plan, you can make an adorable and long-lasting jewelry organizer yourself. You can consider working on this idea, especially if you have a small organizing space. The reason is that you can mount this displayer easily on the wall. To make this displayer, you will need a recycled picture frame, metal mesh, nails, a nail gun, screwdriver, small cup hooks, white paint spray, sanding block—drill bits, tape measure, pencil, rod hanger, wooden dowel and drywall anchors. blesserhouse
16. DIY Wooden Bracelet Holders
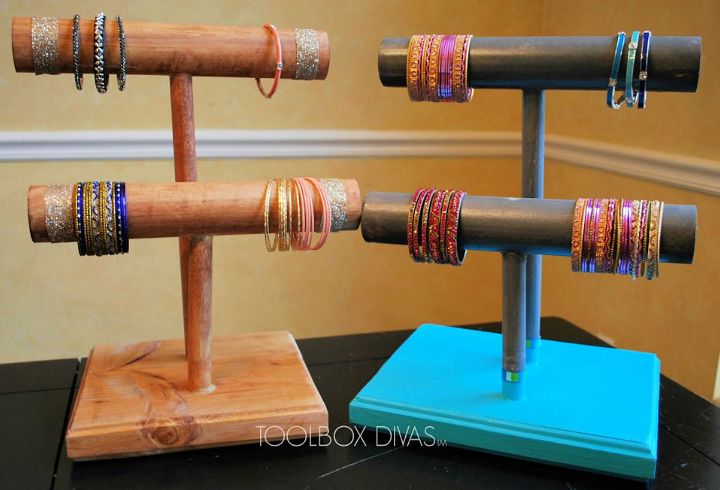
No doubt, bracelet holders look mesmerizing and versatile, especially on the dressing table. Learn how to make a fascinating bracelet holder yourself instead of getting it from a store. Even if you are a beginner crafter, you can still work on this idea by following the step-by-step instructions and guidelines. Excitingly! You don’t require expensive supplies to get your hand on this holder. You can make it affordably and efficiently within a few steps or things. The basic required materials for this craft are holders of your choice, wooden dowels, hardwood dowel, woodcut pieces according to your needs, a hot glue gun, wood glue, spade bit, drill bits, pencil, tape measure and paint of your choice. toolboxdivas
17. DIY Topsy Turvy Jewelry Box
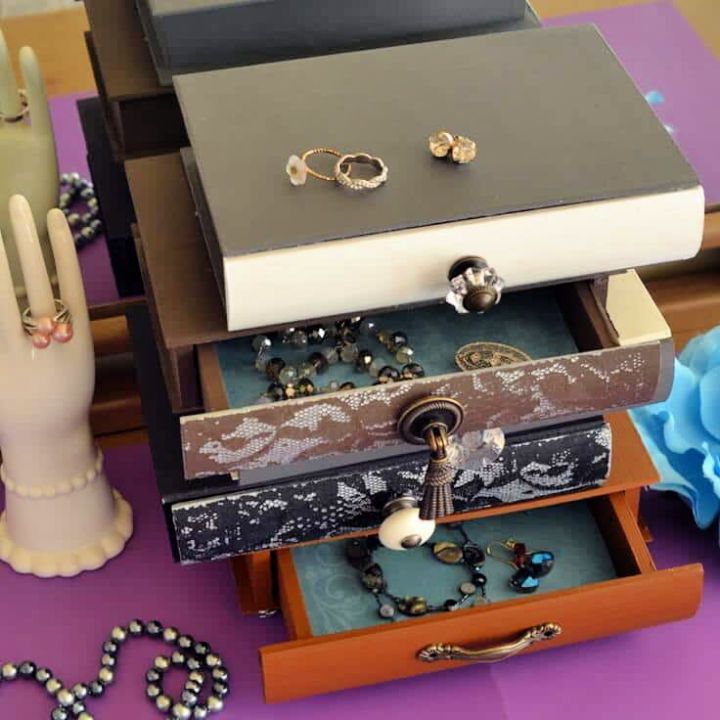
Are you looking for some extra and versatile space on your dresser to organize the jewelry items? If yes, nothing would be a better option than making this Anthropologie-inspired topsy-turvy jewelry box. You can make it yourself by following the instructions and guidelines. The needed materials for this project are wooden drawer boxes, Gesso primer, acrylic craft paint, mod podge, paintbrushes, vintage-style knobs, large silver round beads, scrapbook paper and decorative ribbons of your choice. kenarry
18. Creative Wall Jewelry Organizer
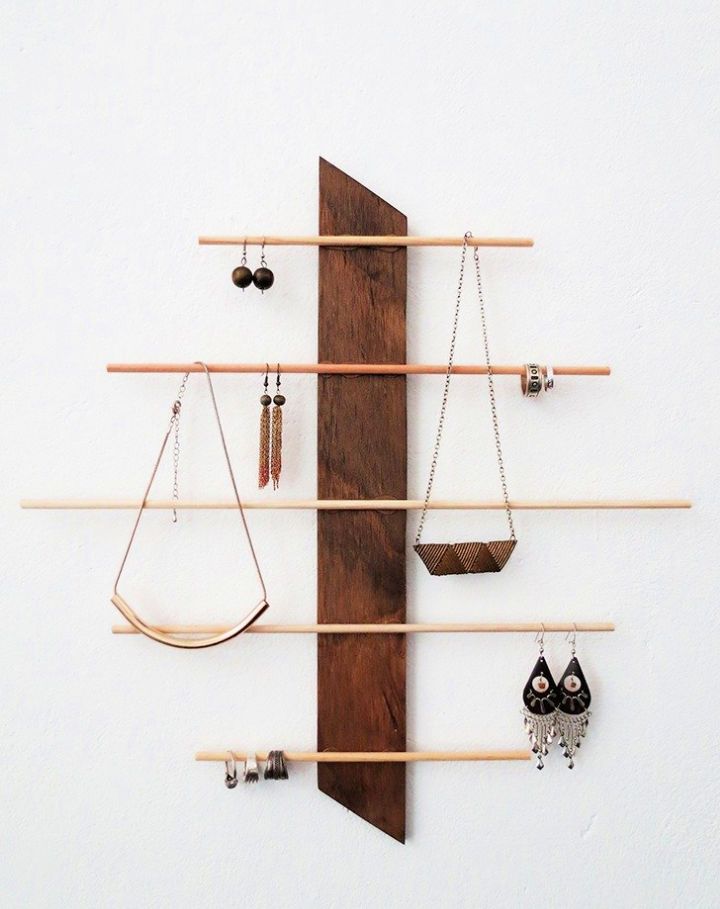
Display your jewelry items in your wardrobe or room in a versatile way with this wall jewelry organizer. Even if you have a small space, you can still have this organizer in your room. Not only for the room, but you can also consider working on this idea to display the jewelry in an exhibition. If you want to make this wall-mounted displayer, you will need a piece of plywood, wooden dowels, wooden glue, sanding paper, paint of your choice, a hammer, nails, nail gun and a handsaw. dreamalittlebig
19. DIY Wood Jewelry Organizer
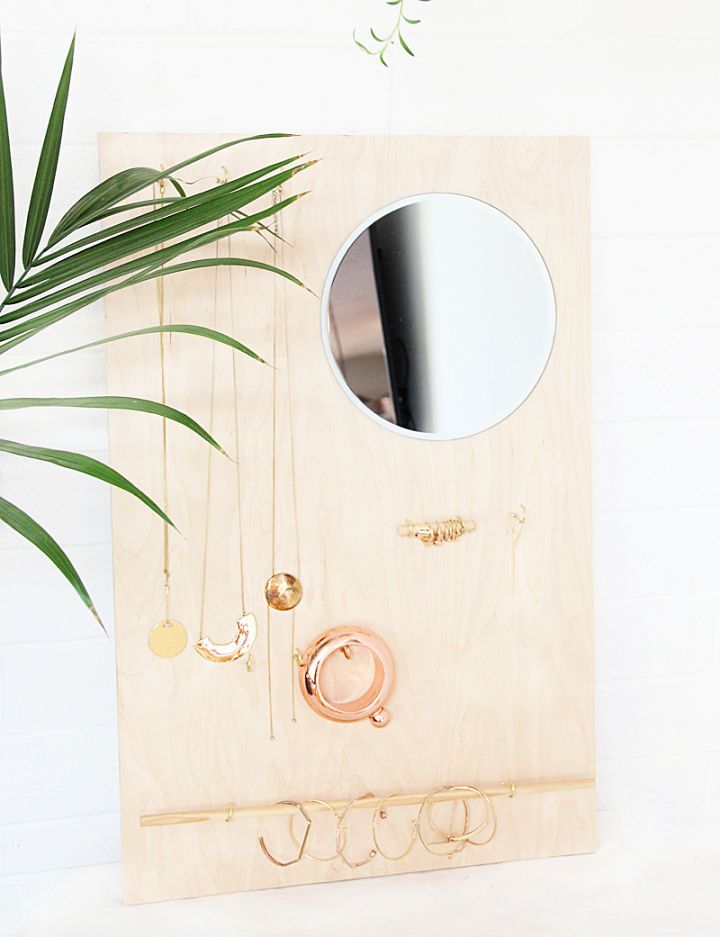
Give your main bedroom a final touch or quick revamp by adding this adorable wooden jewelry organizer. Not only for revamp, but you can also consider working on this idea if you have small space to organize your jewelry items. Indeed, it would be the perfect way to give your closet a revealing look. To make this organizer, you will need wood, gold cup hooks, wooden dowels, a mirror, heavy-duty glue, a drill and nails. Make sure to outline or mark the space where you want to add the organizer and mirror. abubblylife
20. Customizable Jewelry Organizer
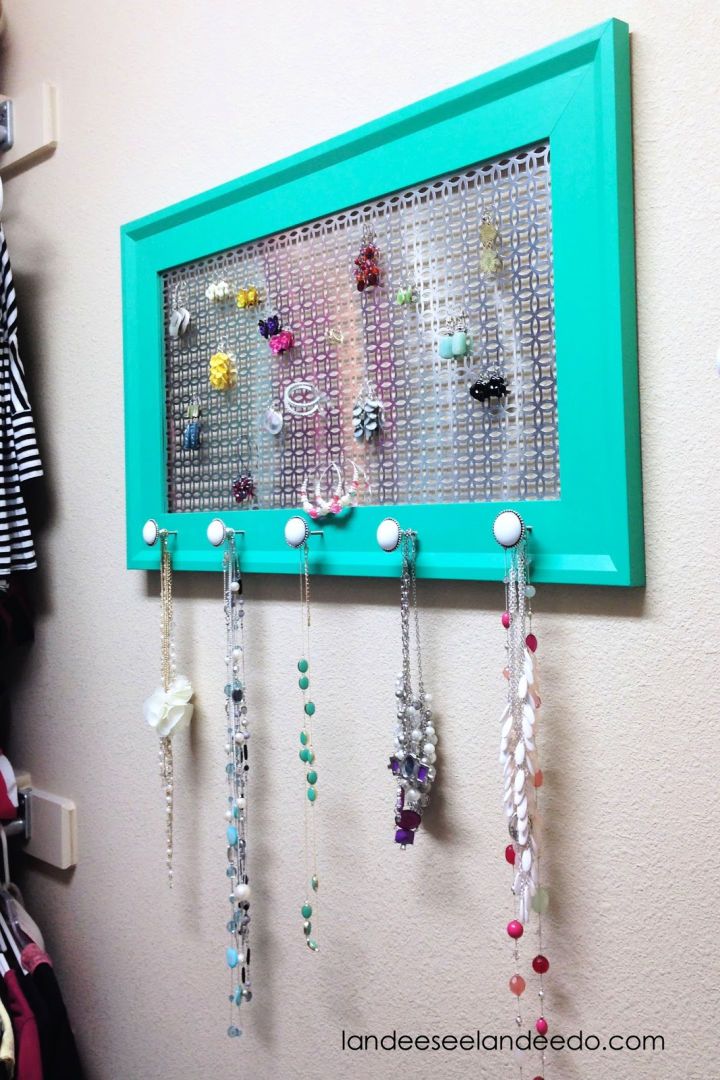
Add a customized jewelry organizer to your room or wardrobe with recycled materials. If you are working for the first time on this idea, you can get the guidelines and step-by-step instructions from the DIY plan. Indeed, it would be the best way to display your jewelry items in a clutter-free manner. The needed supplies for this display are a decorative metal sheet, a picture frame, decorative knobs, primer, wood paint, paintbrush and Glazier points. You can also paint this organizer to match your room’s interior. landeeseeland
21. Chicken Wire Jewelry Organizer
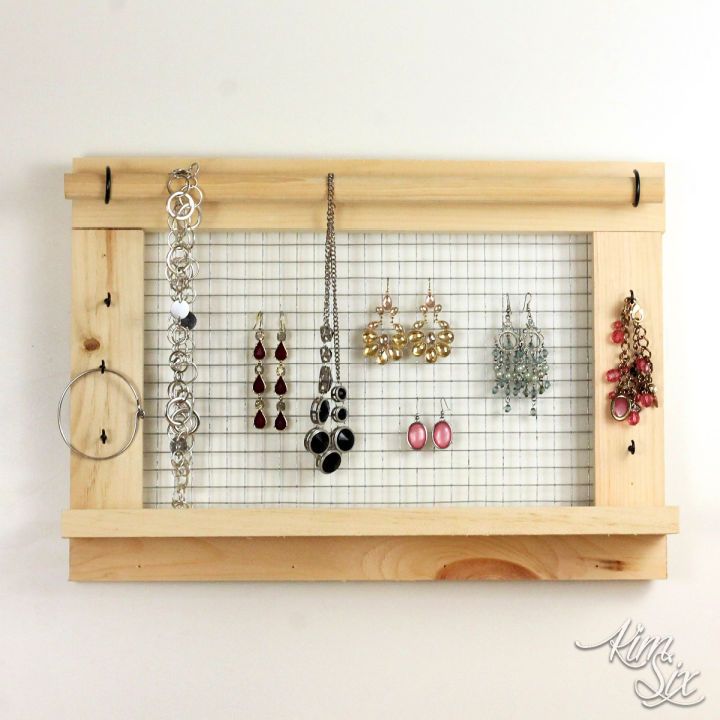
Chicken wire is the perfect and easiest way to organize jewelry items effortlessly. If you also want to make a DIY jewelry organizer yourself, you can get this idea’s complete guidelines and instructions. Indeed, it is an ideal way to display your handmade ornaments in a versatile way. The required materials to make this organizer are chicken wire, lattice molding, woodcut according to your needs, wooden dowels, cup hooks, wood screws, power drill, screwdriver and a brad nailer. You can also paint the wood frame to make this displayer a little bit more fascinating. thekimsixfix
22. DIY Ombre Necklace Rack
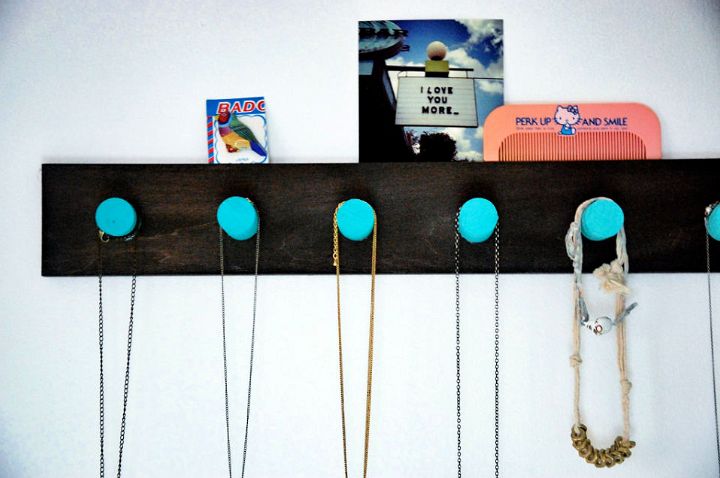
Do you have a limited wall or organizing space for the jewelry organization? If yes, nothing would be a better option than adding this versatile Ombre necklace rack to your room. Indeed, it would be the best revamping project for your bedroom. On the other hand, you can showcase your handmade necklaces to all by hanging them on this rack. The needed supplies to make this Ombre rack are a long piece of wood for the back, Ombre paint, paintbrush, wooden dowels, wood glue, the wood stain of your choice and cheesecloth to clean the excessive paint. wellitsokay
23. Shallow Box Jewelry Organizer
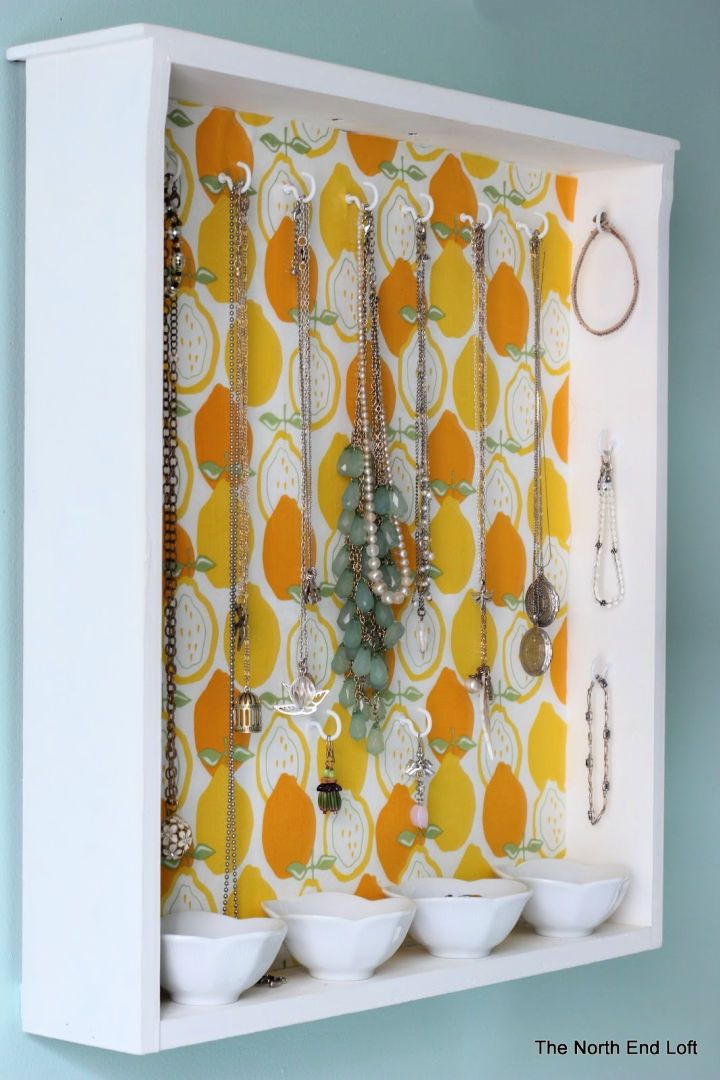
Reuse an old shadow or shallow box from your collection to make an affordable jewelry organizer. You can also add this organizer to your room for decor or revamp purposes. In this way, you can keep all your jewelry items clutter-free and well-organized. The things you will need to complete this craft include a shadow box, white paint stain, paintbrush, sanding block, small cup hooks, drill bits, tape measure, pencil, small bowls and wooden dowels. You can use the bowls to store the rings and other ornaments of your choice. thenorthendloft
24. Shabby Chic Jewelry Organizer
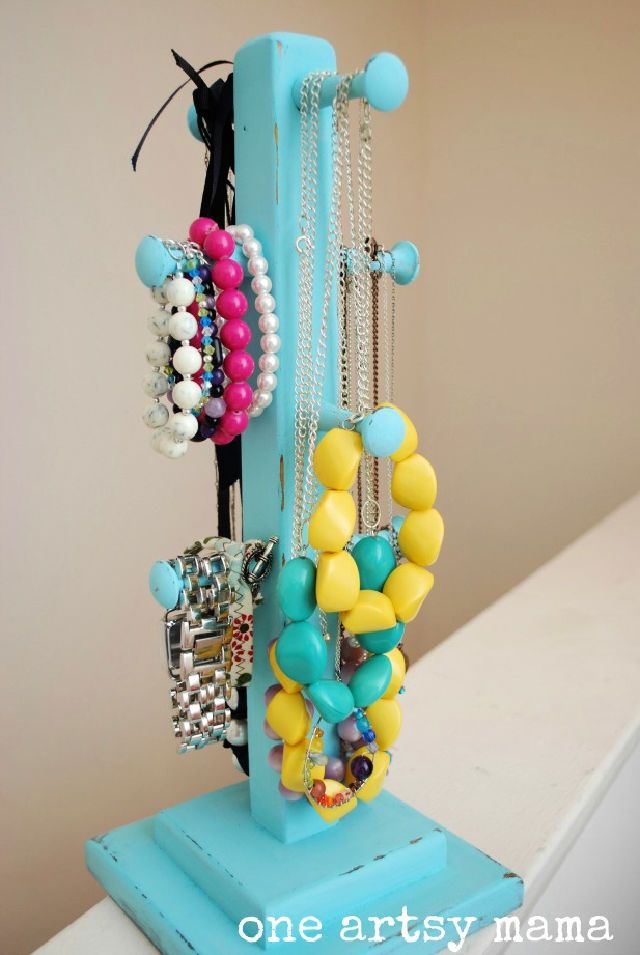
Do you want to show your creativity to all? If yes, you will surely adore having this Shabby chic organizer in your collection to display handmade jewelry items. Not only for displaying your jewelry items, but you can also make this organizer gift your friend. Excitingly! You don’t need to get anything new and expensive to make this organizer. You can craft it efficiently with the help of a recycled table’s leg. Moreover, you will need vintage-style knobs or dowels, wood glue, chic paint in the desired color, paintbrushes and a drop cloth. amylattacreations
25. Dishes As Vintage Jewelry Organizer
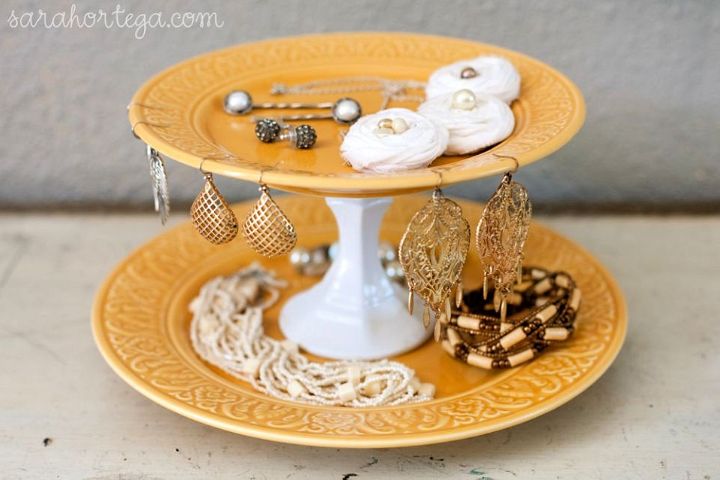
Do you have useless or discarded cake stands in your collection? If yes, you will surely love to reuse those stands to make a versatile and vintage jewelry organizer. You can place this organizer in your room wherever you want or on the dressing table. The things you will need to make this vintage-style organizer include a plate of your choice, a candlestick, a desired flat surface item, epoxy glue and heavy books. Let the epoxy glue completely dry before using this customized organizer for displaying the jewelry items. sarahortega
Related DIY Projects:
DIY Wood Plant Stand – A wood plant stand is a great way to add some height and style to your decor. This is an easy DIY project that can be done with a few simple tools.
IKEA Pegboard Ideas – Find your perfect Ikea pegboard idea from the thousands of images uploaded by IKEA customers.
DIY Jewelry Box – This jewelry box is the perfect gift for a loved one, or to treat yourself. It will look beautiful on any dresser and make getting dressed that much more enjoyable.
DIY Wall Organizer – Say goodbye to messy living spaces, cluttered and chaotic wardrobes and kitchens. Keep your belongings tidy, organized and accessible with a DIY wall-mounted organizer.
DIY Gift Box – With DIY Gift Box, you can get creative and make your own personalized gift box! And it’s easy. Design online, customize with your favorite colors, patterns, and fonts. Then send your gift boxes to friends or family on their doorstep.
Conclusion:
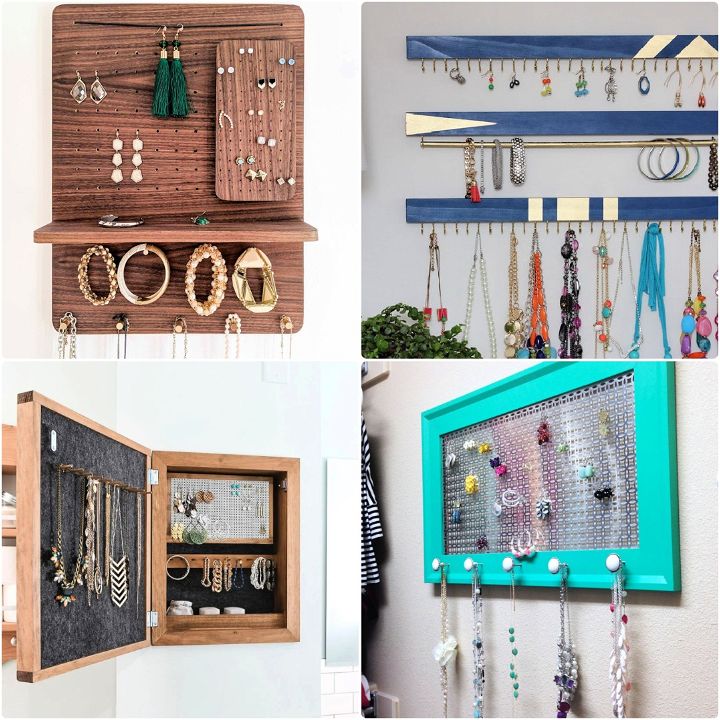
And this marks the end of our beautiful collection of DIY jewelry organizer ideas! We hope you enjoyed going through them as much as we did share them with you. It’s time to choose your favorite option from the aforementioned DIY jewelry organizer ideas and give the project your best try. Our versatile ideas are open to everyone! Even novice crafters can give this super cool project a perfect shot. Not only that, but a super cute DIY jewelry organizer can make the best gift for your best friend. What do you think? DIY in their favorite color scheme and make their day special just like that! So, are you ready to begin your ‘perfectly organized jewelry’ journey? Grab on to all the essentials required and start making it right away. Happy organizing! 🙂
